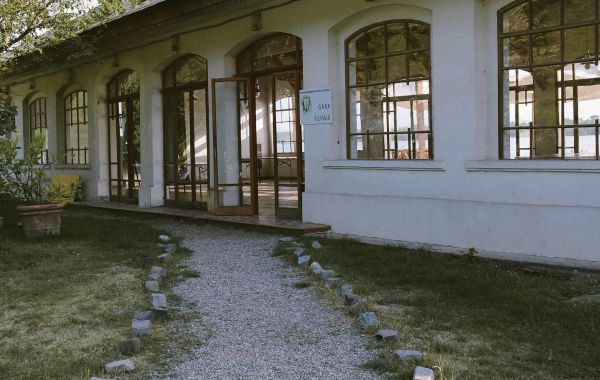
Usually, a driveway is created (or at least the ground is leveled and compacted) simultaneously with the foundation of the house, because construction requires a convenient way to deliver building materials or liquid concrete.
Stage - a path around the house, drainage from the walls - is arranged simultaneously with the last stage of the foundation or soon after. This, firstly, allows for immediate high waterproofing of the foundation, and secondly, facilitates construction work. On the blind area it is much easier to drive around the house, move cargo in a wheelbarrow or install ladders, say, to install windows or gutters. Stock up on the necessary equipment, including a driveway harrow.
When designing a driveway, you need to have an accurate idea of where the gate is, where the house is, and where the owner's car will be. Will it always be parked in the garage, or will it sometimes be left under a shed between the garage and the house, maybe there are plans to park several cars at once? Will the garage be built into the house and have a common foundation with it, or will it be arranged as a separate building?
The approach to the layout of the driveway must be rational. A huge paved area in front of the castle and a winding gravel path leading to it from the gate, planted with pruned shrubs, of course, looks epic. But on a plot of 10-15 acres is better to do a covered area near the gate and a built-in garage.
That is, the path becomes a platform - a length of one and a half to two car lengths, width of two car widths plus another meter and the same width of the gate. You can also provide space for easy access to the house. This will allow if necessary to put at least three cars on the site - one strzu drive into the garage, two put on the site.
A short driveway saves "empty" space. If necessary, the same area can be used as a terrace. Usually the platform or walkway is elevated above the ground, so it is important to provide a ladder to the site (if you plan to carry something from the gate in a wheelbarrow, you also need a ramp).
Paving around the house is designed to protect the foundation from moisture
If the house is supposed to be at the back of the lot and/or the garage will be far away from the house, you can arrange for a long narrow road (you can even make it decorative) on the lot that is wide and curvy enough for it to go straight and back. Entrance directly into the house may not be provided, it is at the request of the owner. It all depends on whether you plan to return home in the rain, and how much you are afraid to get wet if you have to walk in the rain from the car (garage) to the house - say, 10 meters.
A long trail will also allow you to park several cars behind each other. However, parting with them will be uncomfortable. It is good if you can arrange a turntable in the garage. The device on the "ring" or the areas to turn in front of the garage is not rational, because it takes space.
However, a long and especially "looping" path has its undeniable advantages - it is decorative, can be designed as a walking area or solarium, surrounded by beautiful low (not prickly) plants, and children are happy to ride on such paths on bicycles, rollerblades and skates.
Arrangement of the roadway.
After marking the area allocated for the path, all the layer of fertile soil is removed from it.
Geotextile protects the lower layers of the path from moisture, and therefore from deformation
If the soil below is soft, it should be taken away for another 20-30 cm and replaced with clay, if it is dense, such as clay, doping is usually not done. Soft soil does not hold pressure, and if water gets under the bed, it will start to deform and sag under the weight of the machine. The depth of the bed, therefore, is 25-30 cm. Moisten and compact the soil. You can add clay to raise the road. Each bulk layer is further compacted. You can use rollers, rammers or hand rollers, fill them with water to a weight of 150-200 kg. Clay, first, well holds its weight, and secondly, drains moisture. At this stage, it is better to provide a slight slope of the surface of the clay cushion, so that the water can easily drain away. The slope is made in one or two sides "hump", arrange drainage ditches.
Lay a layer of geotextile.
Build a sand-gravel cushion. Since we are not building a highway, the depth of the road bed in 1.5 m is not particularly important for us. 30-50 cm is enough. A layer of sand is poured on the tamped clay - 15-20 cm, tamped and a layer of small crushed stone is poured. The profile of the road should also be a small "hump". You can put a board across the road and drive back and forth with it.
Install curb blocks, fix them with rebar and concrete.
Arrange the road surface. It can be made of asphalt on gravel, concrete - in the form of reinforced screed, or paving with tiles or brick blocks.
Asphalt is a filled plastic based on bitumen resins, hardens (matures) for a long time, several years, and it is important to protect it from water. If it gets under the bed, the asphalt will crack and swell. It is laid in two layers - first coarse-grained, then fine-grained, each layer is rolled.
The structure of the driveway is like a puff pastry
To perform the concrete screed, the prepared bed between the curb blocks is poured with concrete, reinforcing mesh with a mesh of 10*10 cm is suitable. The screed can be left with a screed, and on top of the tiles can be laid - clinker, porcelain.
To perform paving you can first make the screed, or you can lay immediately on a tamped gravel cushion. The base is filled with a sub-base layer - sand, mixed with cement, 3-5 cm deep, and paving stones (bricks, tiles) are laid, leveled, slightly hammered into the cushion. When the road is asphalted, it is covered with the same mixture from above and rubbed into the gaps between the blocks. Then compaction with vibration equipment and moistening is mandatory. Pattern and paving material can be any.
Decorated roads look beautiful - you can install a mosaic pattern of flat stones, colored glass, ceramic tiles or granules in the asphalt covering or the face layer of concrete.
Concrete slabs laid over a layer of sand would also be a good option, especially if the path is short.
Arrangement of paving slabs.
There are no fundamental differences between the arrangement of paving and driveway, except that the cushioning layer should be less, since it will be less stressed. The purpose of paving is to make it easier to move around the house and divert water away from the foundation, and to prevent water from getting between the wall and the ground.
Fertile soil along the wall is usually selected at the foundation stage.
The presence of a reinforcing mesh is mandatory, it gives additional strength
The paving of the beds is done with a depth of 30-40 centimeters. Ready paving should be at least 80 cm wide, a layer of clay is placed at the bottom of the furrow, forming a small slope away from the wall.
Then a layer of geotextile (polyethylene film, roofing felt) is placed partially on the wall. A fold is often laid near the wall in case the ground moves, and the upper edge of the foil is fixed with a batten. The width of the foil should be calculated so that it covers the whole width of the paving stone and rises along the wall by at least the height of the paving stone. Ideally, the foil should be elevated above the level of the paving and hidden under the exterior wall cladding, the wall cladding should be done after the paving is finished.
Make a sand and gravel cushion.
If necessary, install curb blocks, secure them with rebar and cement. The paving stones should be at least 3 cm above the ground level, have a slight slope from the wall to the outer edge and be laid flush with the curb, otherwise the water will not flow out of it. That is, the border here plays a purely restrictive role for the surface material. Do not make a large angle of slope - otherwise it will be difficult and dangerous to walk in the rain and ice. Every 3 meters or in places where water can run off the roof, make an additional gutter.
Together with the curb block it is important to make a drainage groove, its bottom can be filled with concrete with granules, it looks very decorative/.
Prepared cushion pour concrete (reinforced) or pave it on an additionally laid sand-cement base. You can also lay it on the screed. It is important that the material is not slippery, especially when wet.
Since auxiliary paths will depart from the sidewalk, it is important to provide platforms for climbing on them.
Ideally, paving stones and paths are made in the same style and at the same level, but you can arrange different levels, make terraces, stairs, ramps, and emphasize them with small waterfalls or climbing, ampelous plants.
Source: https://svop.org/


